SandArt Robot
A sand painting robot

The SandArt Robot is derived from the open-source Dummy-Robot, an initiative led by peng-zhihui. Several significant enhancements have been introduced, encompassing hardware, firmware, and novel software algorithms, with the primary objectives of enabling low-cost 3D printing for the robot arm, thereby reducing its dependency on conventional CNC components, and optimizing its suitability for sand painting applications.
Hardware modification
Mechanical design
The mechanical design of the SandArt Robot has undergone significant enhancements to make it more amenable to 3D printing, while maintaining repeatability and robustness. The robot arm has been partitioned into six distinct components: Base, Shoulder, Arm, Elbow, Forearm, and Wrist. Here, we will delve into the design changes for each of these components.
-
Base:
For the base, a Sentel harmonic drive with a 1:50 reduction ratio was incorporated. Additional couplings were added to address any misalignment between the harmonic drive axis and the motor output shaft. The base housing has been divided into upper and lower sections for two primary reasons. First, this separation simplifies part replacement and conserves filament. Second, it permits hand adjustments for the first axis without necessitating the disassembly of the entire robot.
Base Base Structure 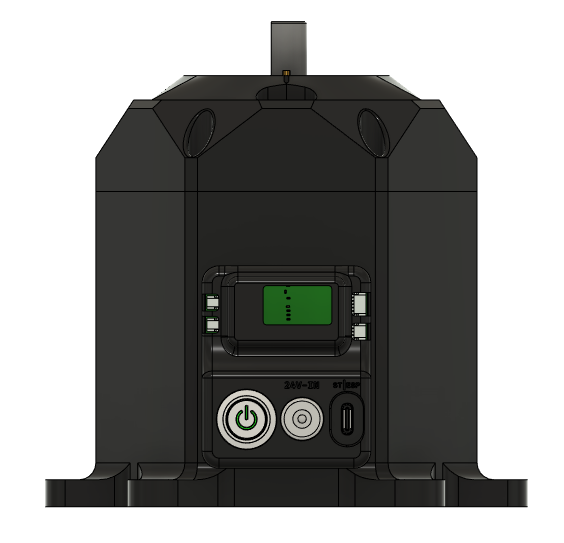

-
Shoulder:
Similar to the base, the shoulder component has been divided into two parts to facilitate replacement and improve printing quality. Additional bearings have been introduced to ensure smooth joint movement and redirect force from the housing to the base housing, rather than the gearbox. This is a critical element of the robot, as it must support the entire upper arm and withstand rotations ranging from -75 to 90 degrees, adapting to changes in payload. It should be noted that this part is a candidate for further CNC manufacturing to optimize its performance.
Shoulder 
-
Arm:
The arm is divided into two parts, the upper and lower sections, for ease of printing and structural strength. Three M3 screws connect the upper and lower parts, providing additional stiffness to the arm. The lower part is connected to the shoulder via a bearing, enabling free rotation of the arm.
Arm front the front Arm from the side Arm structure 


-
Elbow, Forearm:
The elbow and forearm components are relatively straightforward and do not require extensive modification. They can be printed as single pieces.
Elbow Forearm 

-
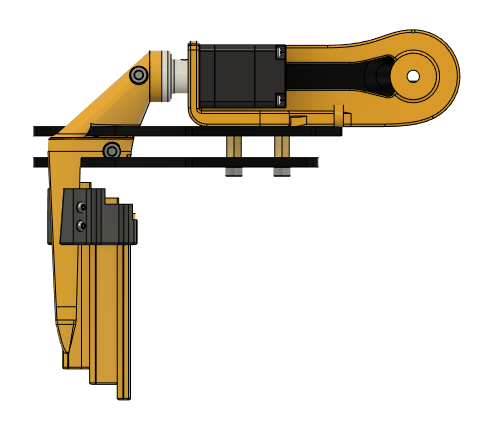
Wrist:
To facilitate closed-loop control of the sand painting process, a camera is essential. The wrist is designed to accommodate two different end-effector tools (Scraper and Sprinkler, further explanation to follow) and provide housing for the eye-in-hand camera.
Wrist 
Electrical design
The SandArt Robot’s electrical design encompasses two distinct PCBs, each tailored for the control of specific stepper motors on the robot arm. The original design introduced a 20x20 mm PCB for NEMA8 stepper motor control and a 42x42 mm PCB for NEMA17 stepper motor control. These PCBs integrate encoders, motor drivers, CAN transceivers, and an STM32 microcontroller.
-
Bug Fixes for NEMA17 Control Board:
A critical issue arose with the NEMA17 control board after fabrication and soldering. It was discovered that flashing calibration data into the MCU memory posed difficulties due to grounding problems. The analog ground and digital ground were directly connected, allowing motor-generated noise to affect the MCU, leading to resets. This issue was resolved by separating the ground (AGND, PGND, GND) and implementing single-point grounding for these ground connections.
-
The NEMA8 control board was less affected, likely due to the smaller stepper motor, which generates less noise.
-
Careful routing of the CAN bus is crucial for signal integrity. Therefore, twisted pairs were employed to route the CAN bus signal outside the PCBs, ensuring reliable communication.
End-effector design
The end-effector of the SandArt Robot is a pivotal component, as it directly interacts with the sand during the painting process. Two distinct end-effectors have been designed to mimic human sand painting techniques.
These designs draw inspiration from the bio-mechanics of how humans perform sand painting. The sand painting process involves two key actions: adding sand and removing sand. The former is achieved by sprinkling sand onto the canvas, mimicking an artist folding their palm into a bowl shape to carry sand. By adjusting the size of the opening between their fingers, the artist can control the flow speed and the amount of sand applied. The latter involves scraping the sand on the canvas, replicating the action of using fingers to swipe sand away from a specific area. Adjusting hand gestures, such as using a single finger, two fingers, four fingers, or the entire palm, allows precise control over the area from which sand is removed, enabling intricate detailing.
Sprinkler
The sprinkler end-effector emulates the hand gesture of an artist while sprinkling sand. It offers the ability to adjust the size of the opening between the fingers, allowing control over the flow speed and the quantity of sand being applied. Various mechanisms, including an iris door, were considered, but mechanical limitations led to leakage issues. To achieve both functionality and simplicity, a two-hole plate and a time hourglass-shaped cup mechanism were adopted. The last degree of freedom of the wrist manipulates the sprinkler.
| Sprinkler side view | Sprinkler side view | Sprinkler disassembled |
|---|---|---|
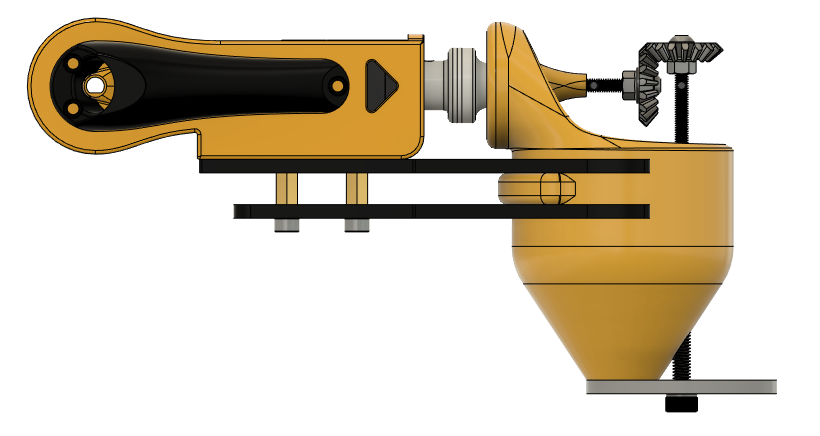 | 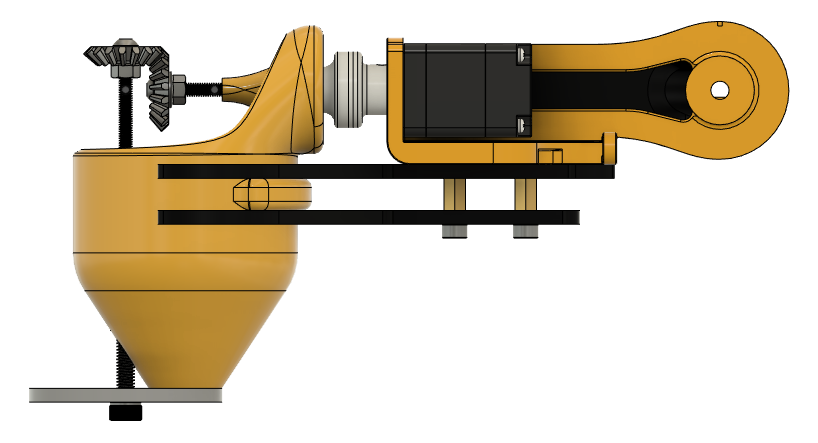 |  |
Scrapper
The scraper end-effector replicates the action of an artist’s fingers. It is a five-sectioned mechanism inspired by the biomechanics of the human hand. The scraper offers the ability to adjust the area from which sand is removed. The last degree of freedom of the wrist controls the scraper.
| Scrapper side view | Scrapper side view | Scrapper disassembled |
|---|---|---|
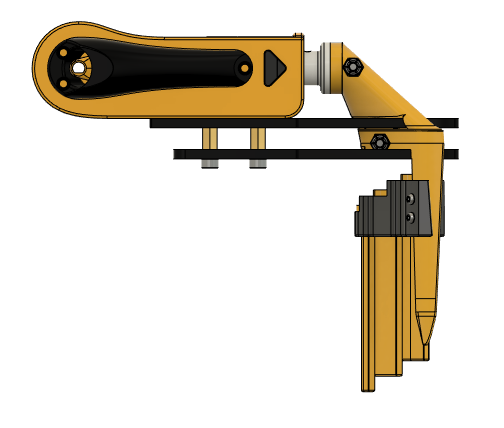 |  |  |
Algorithm design
The algorithm flow chart is shown below: This part is still under development…

Experimental results
This part is still under development…
- Video for the robot arm manipulation
- Video for the sand sprinkling test